Des Inv 22 - UC Berkeley
Designer and Maker
Summer
-
2019
The goal of this project was to design and prototype a cheap vehicle that is able to navigate various type of terrains and is easily steerable. The vehicle was evaluated based on creative propulsion design, elegant mechanism, simplicity and performance.
My contribution span across both design and engineering. I came up with the main rotation control, tri-wheels system, assembly method, and more.
Tools used
Concepts App
Shapr3d
Solidsworks
Affinity designer
CNC router
3D printer
Plywood
Bristol
skills
Prototyping
Fabrication
Problem solving
physics
Design thinking
collaborative problem solving
iterative design

Brainstorming
I worked in a two-person team, taking on the roles of both an industrial designer and, at times, an engineer.
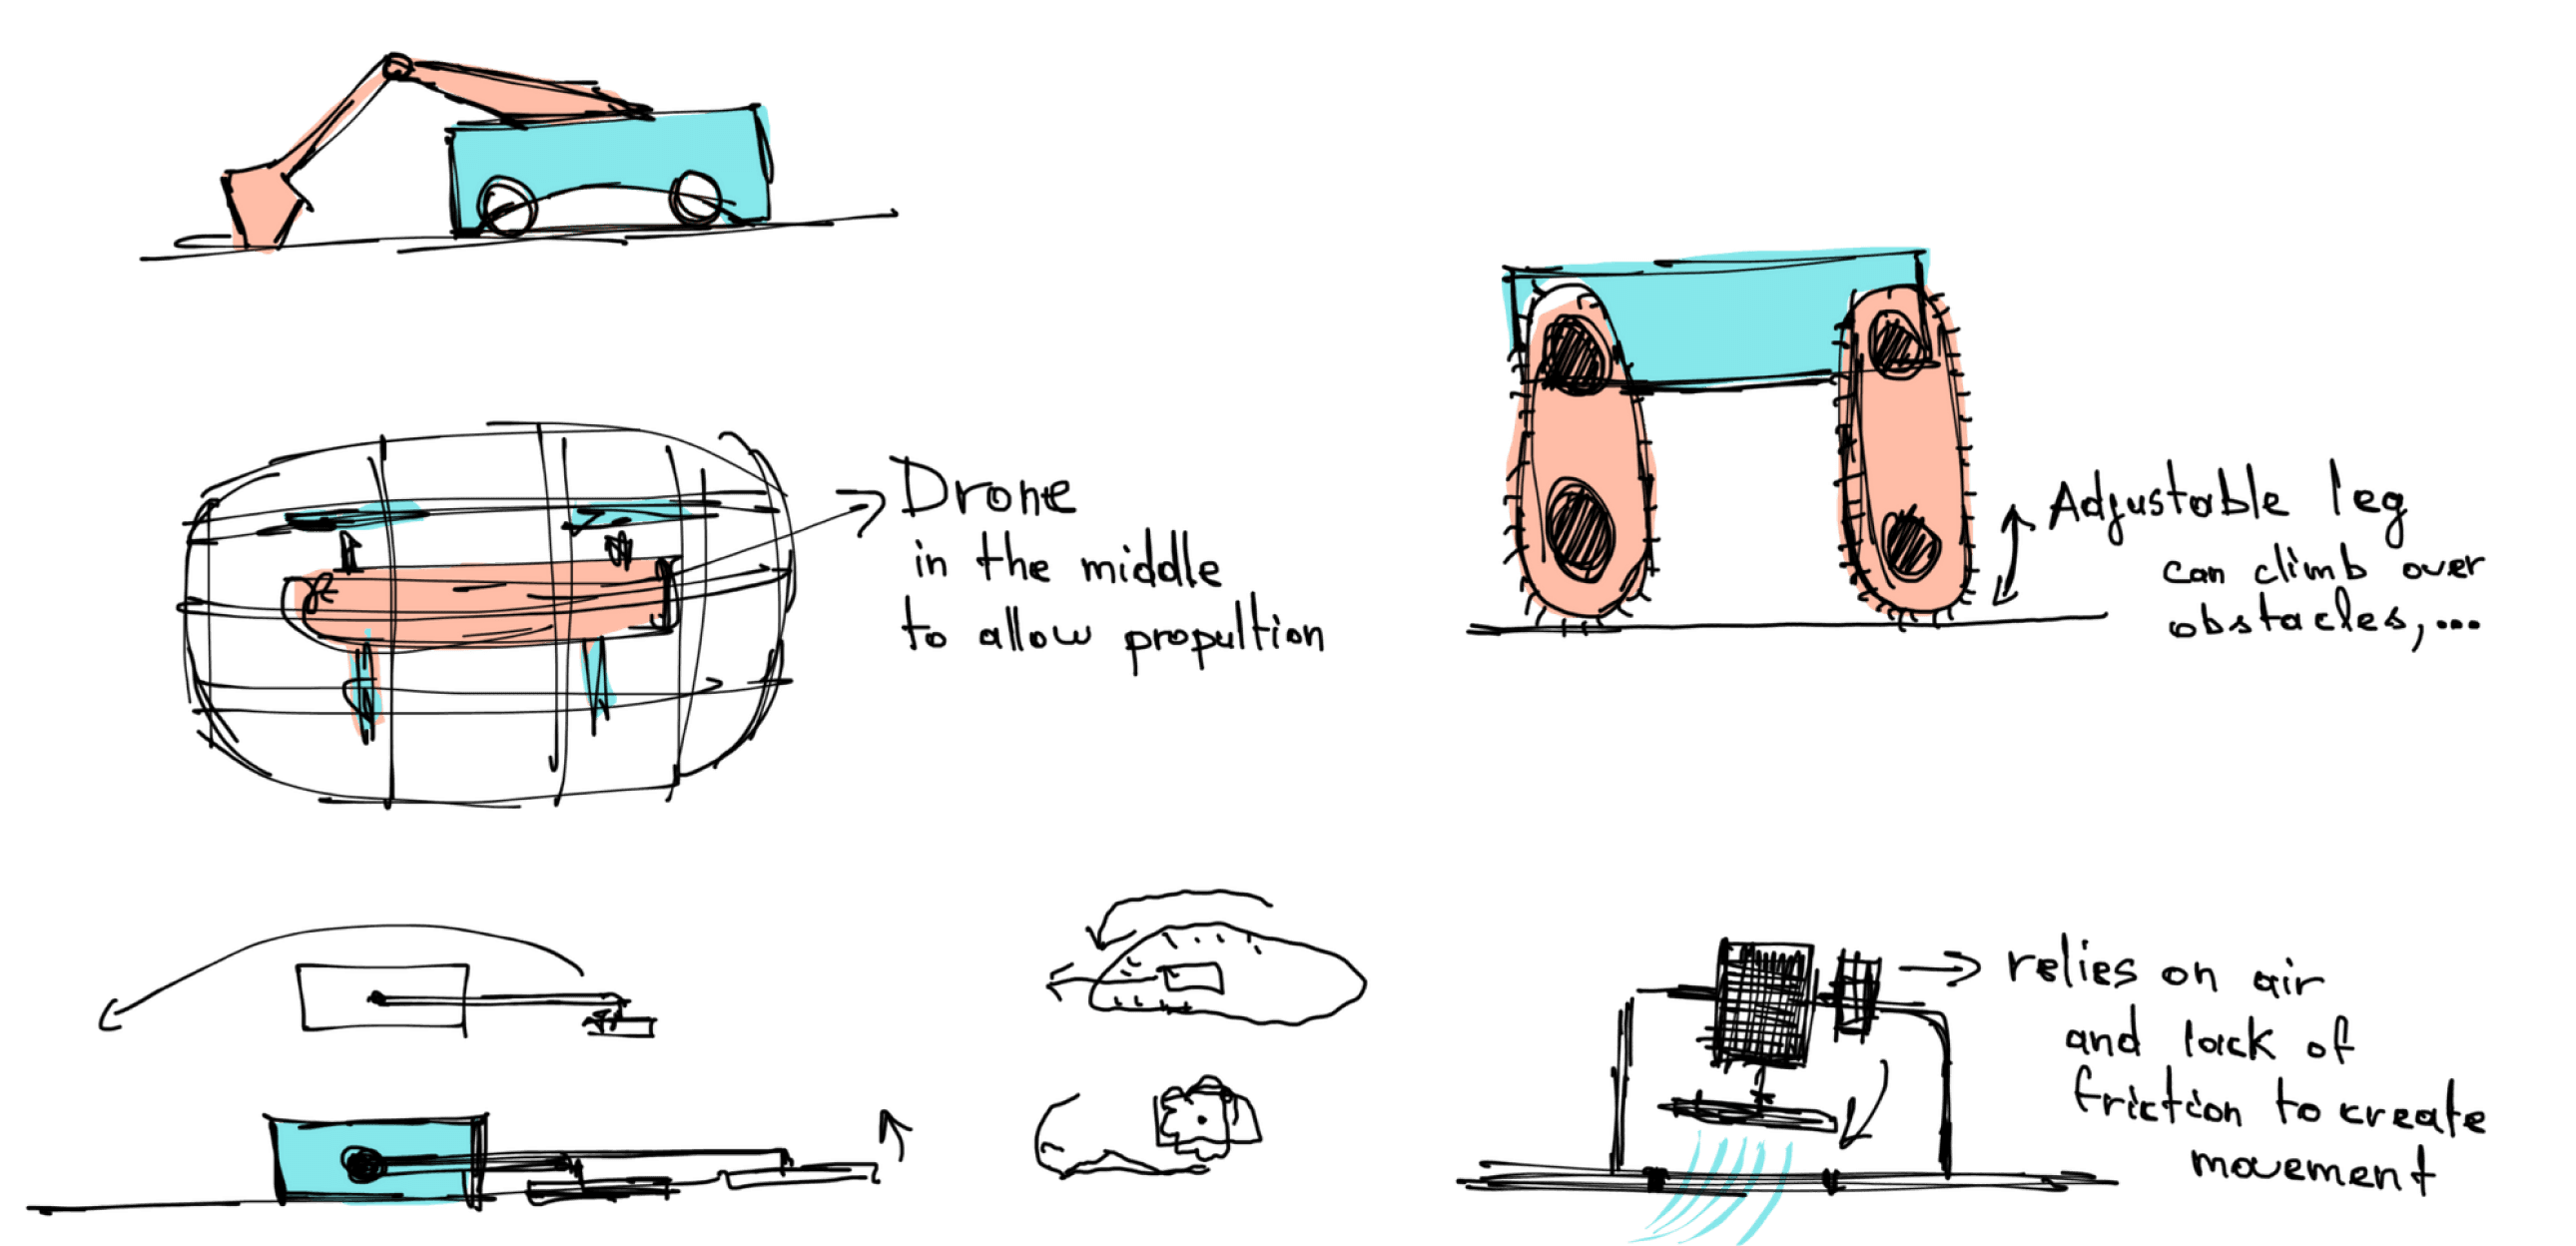
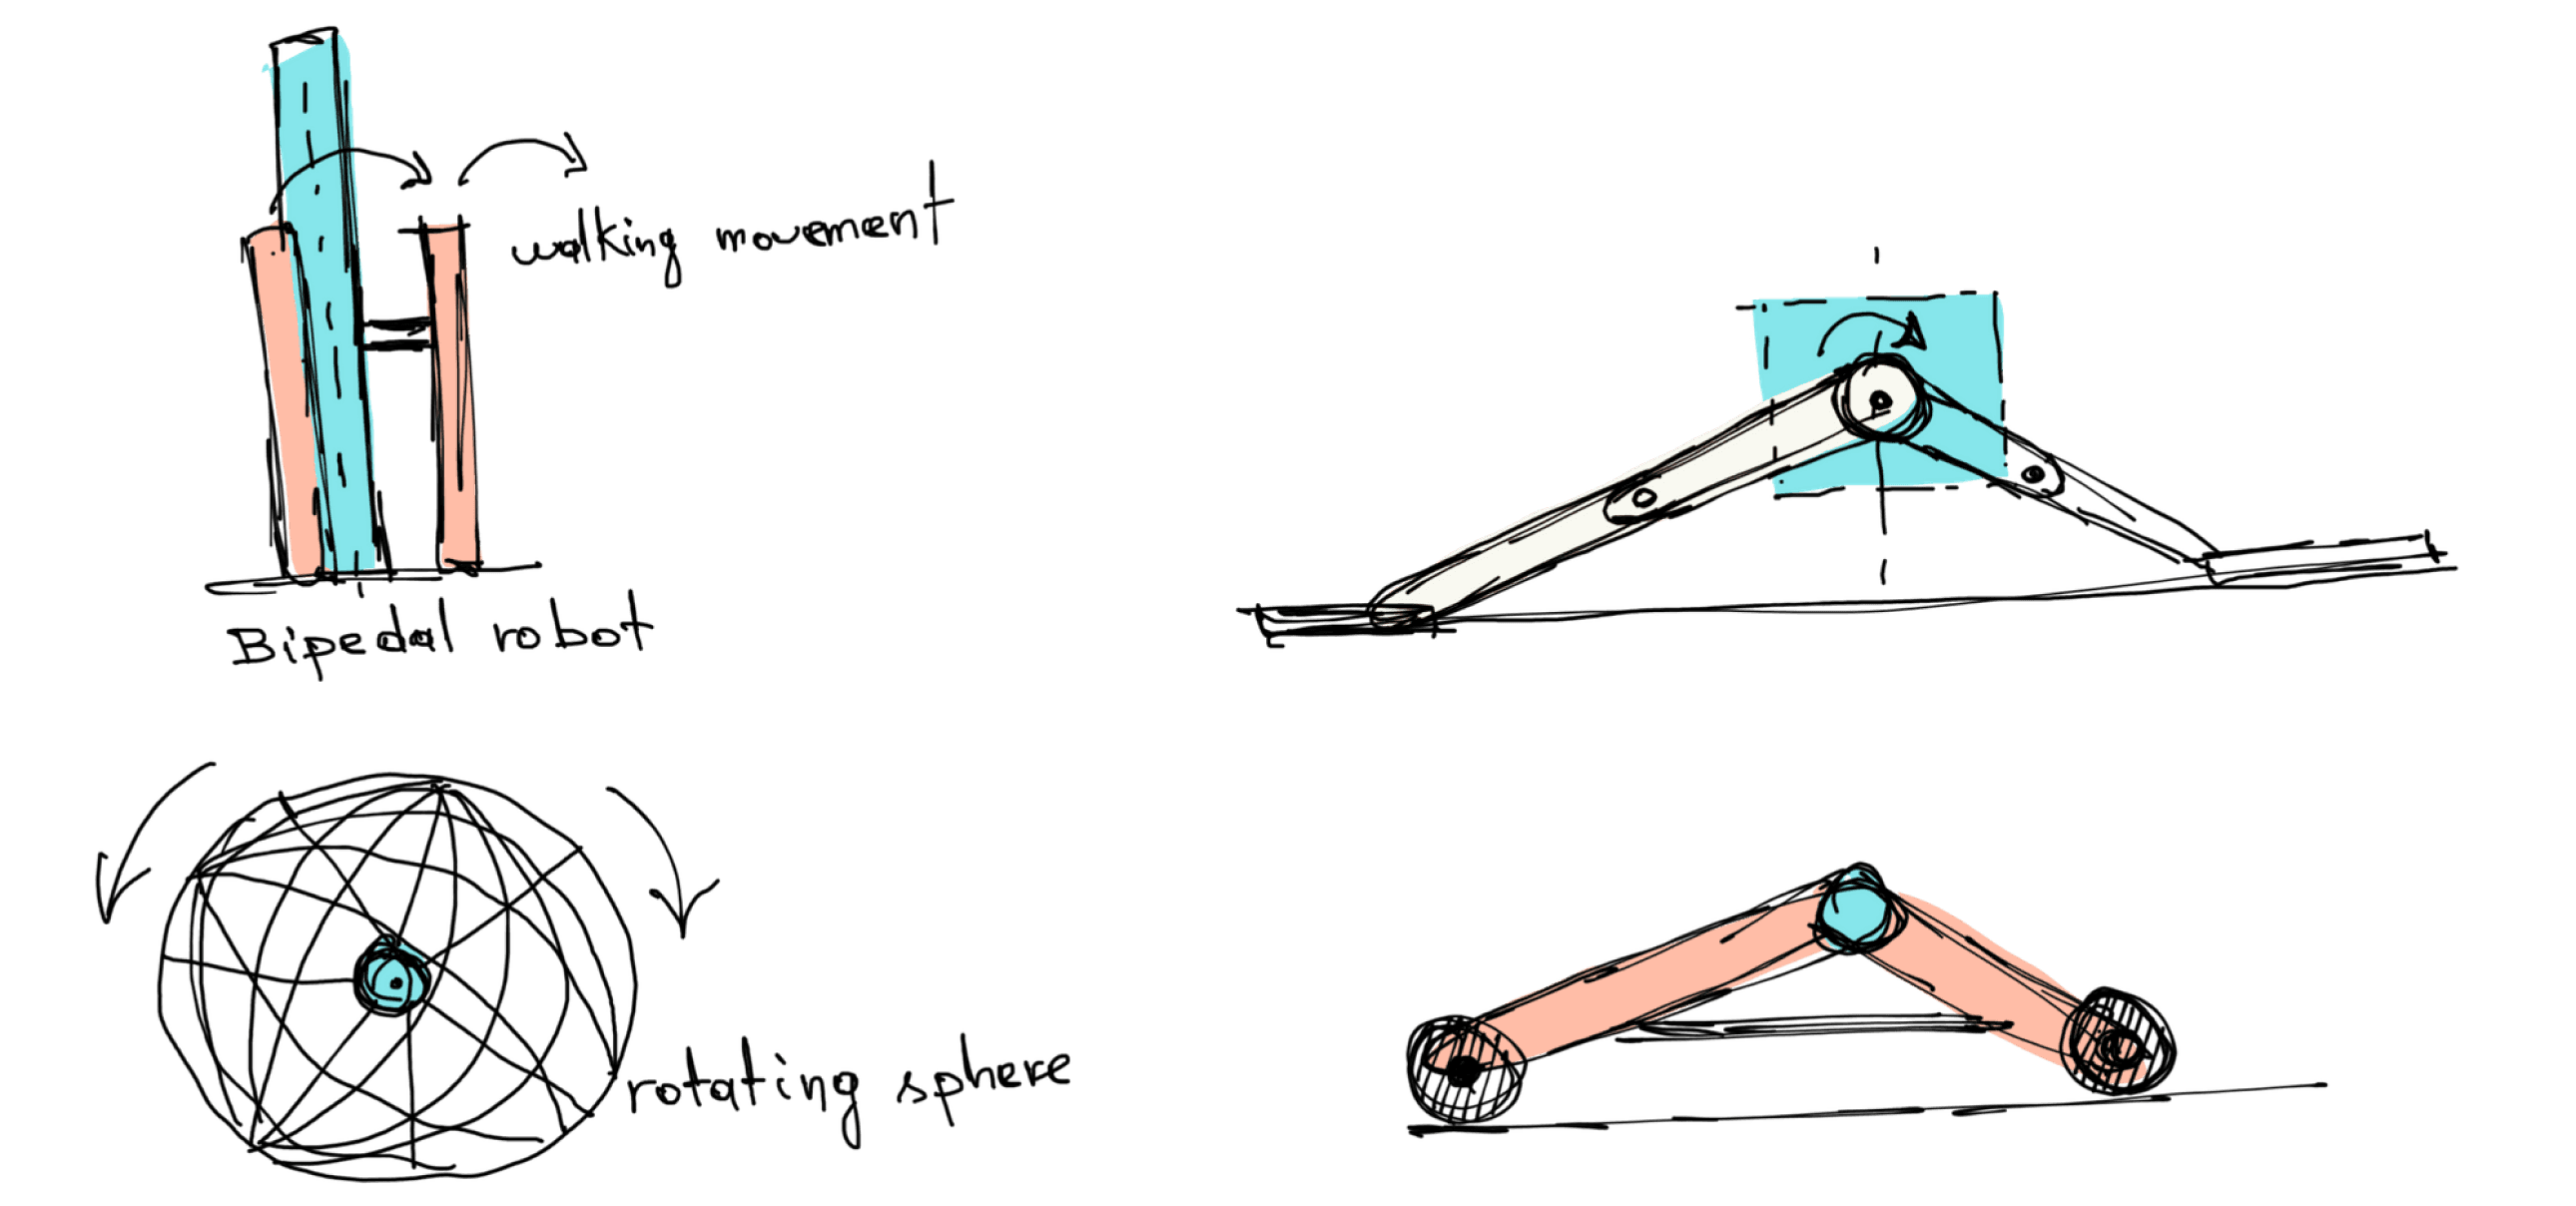
Before setting our minds on an inchworm, we explored multiple options from drones to rotating spheres, bipedal, etc...
When we came across the idea of an inchworm robots, we were immediately captivated—we saw an opportunity to create something special that appeared simple but that relies on a complex yet elegant mechanism to operate.
Understanding an inchworm
Inchworms have a very interesting body can be divided in three parts: True legs at the front and prolegs at the rear with a legless expanse in between.
In order to move forward, inchworms take it one step at a time. First, the rearmost part carried by prolegs moves forward, causing the legless mid-section to arch and loop up.
The inchworm then proceeds to lift and extend its front-end causing it to move forward.
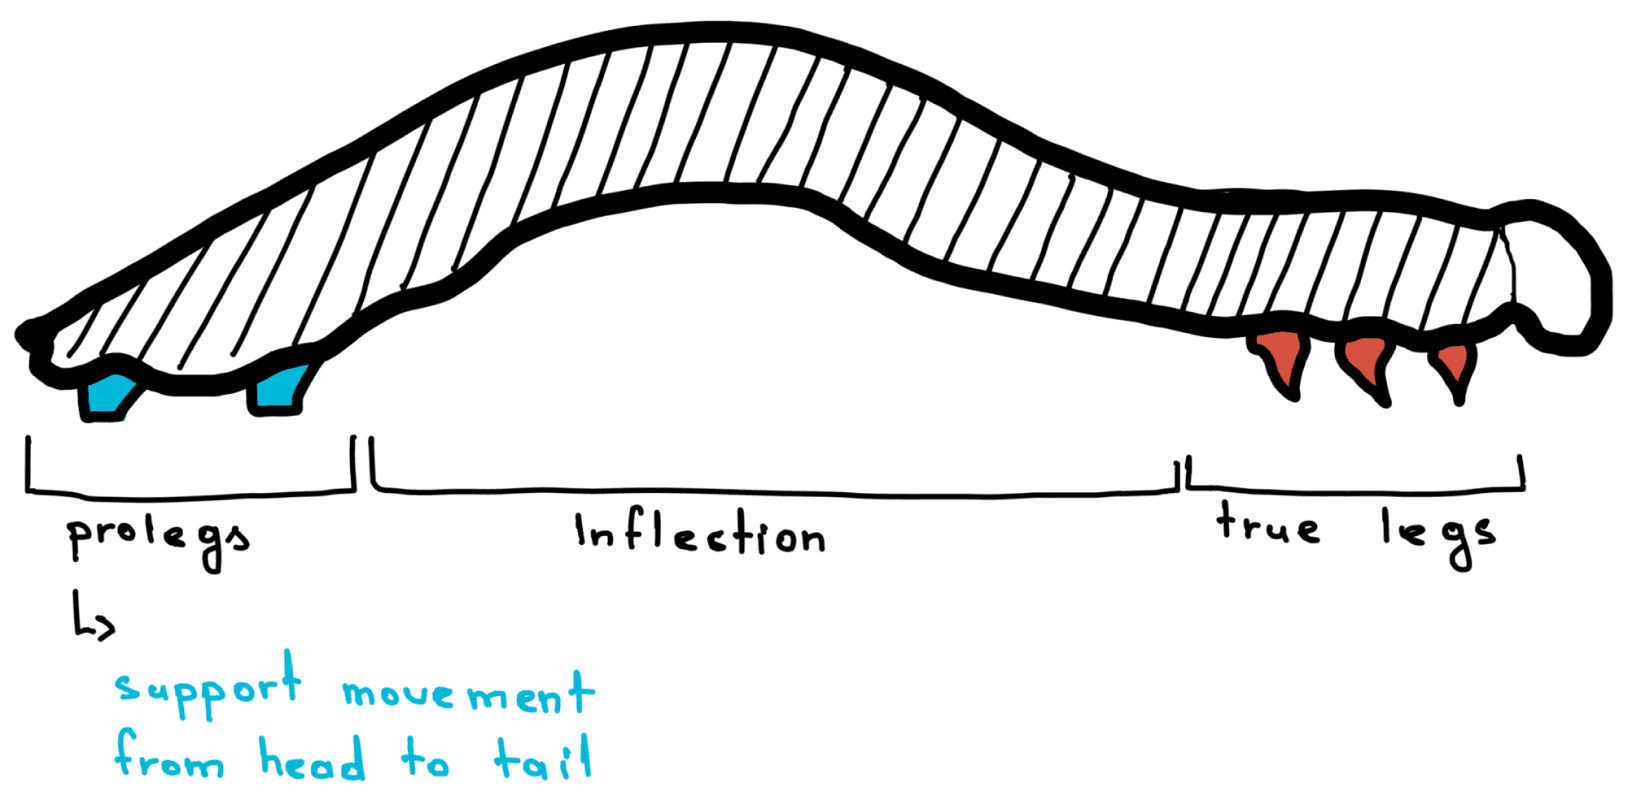
A. Dissection on an inchworm

B. Simplified Inchworm motion
making the inchworm
C. Exploring mechanism

D. Oscillation

E. Push/Pull
Step One: Moving forward
When we decided to inspire our robot from an inchworm, we had a rough idea on how to achieve the desired results based off of the research and the data we had gathered.
We came across many ideas, but the push/pull mechanism was very appealing to us due to its simplicity and the room it left us to innovate and implement our own ideas.
Our first iteration of the inchworm was a simple and non motorized prototype that used cardboard and toothpicks. The vehicle had to be hand maneoeuvred in order to operate.
Having a physical model allowed us to explore further the moving mechanism as well as challenges we may experience along the way.
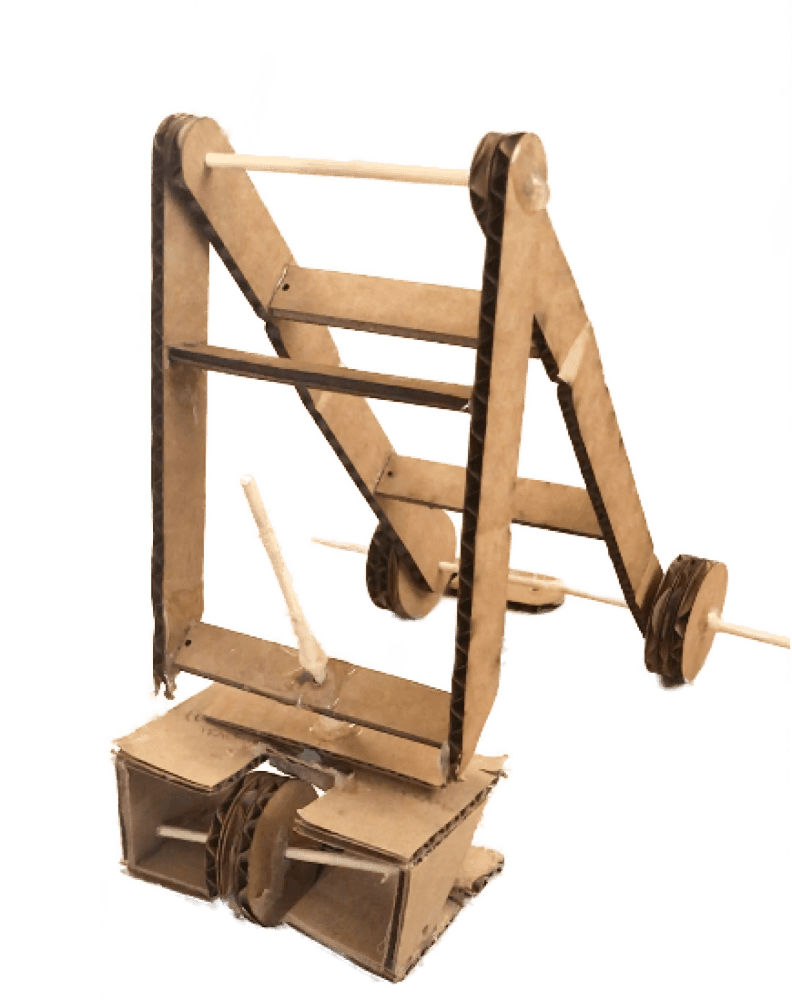
F. Prototype I
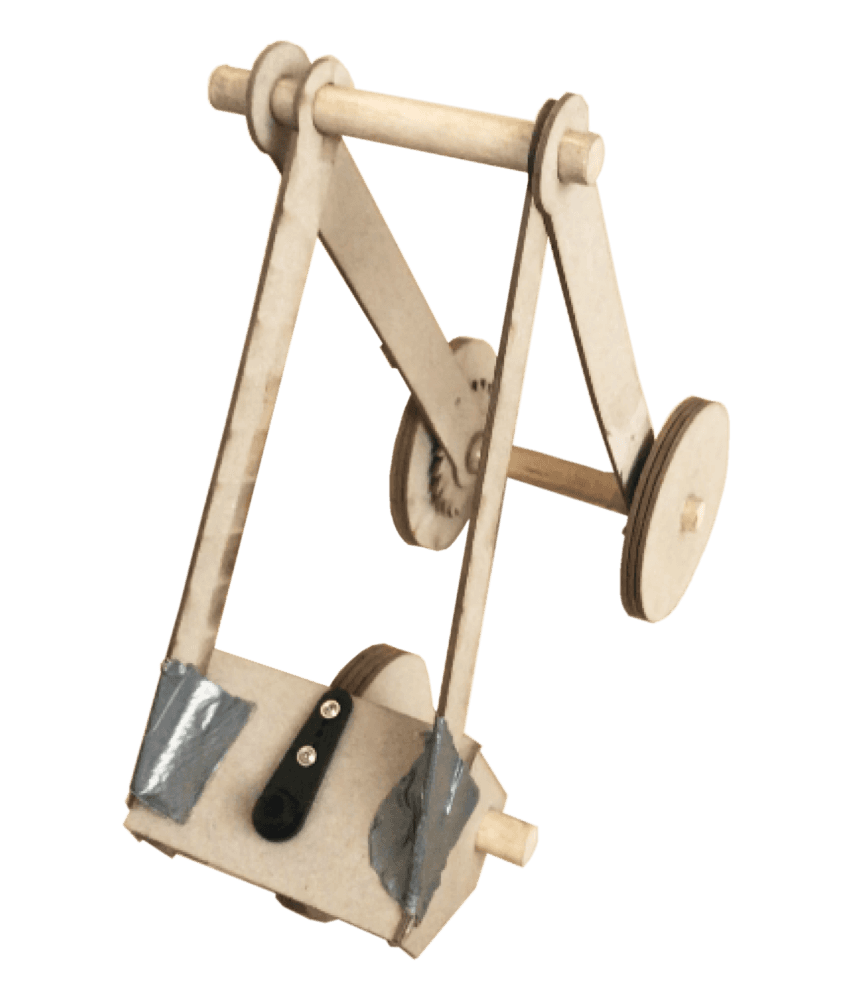
G. Prototype II

H. Pawls iterations
Building a physical prototype allowed us to better test our concept and visualize roadblocks.
Step One: Moving forward
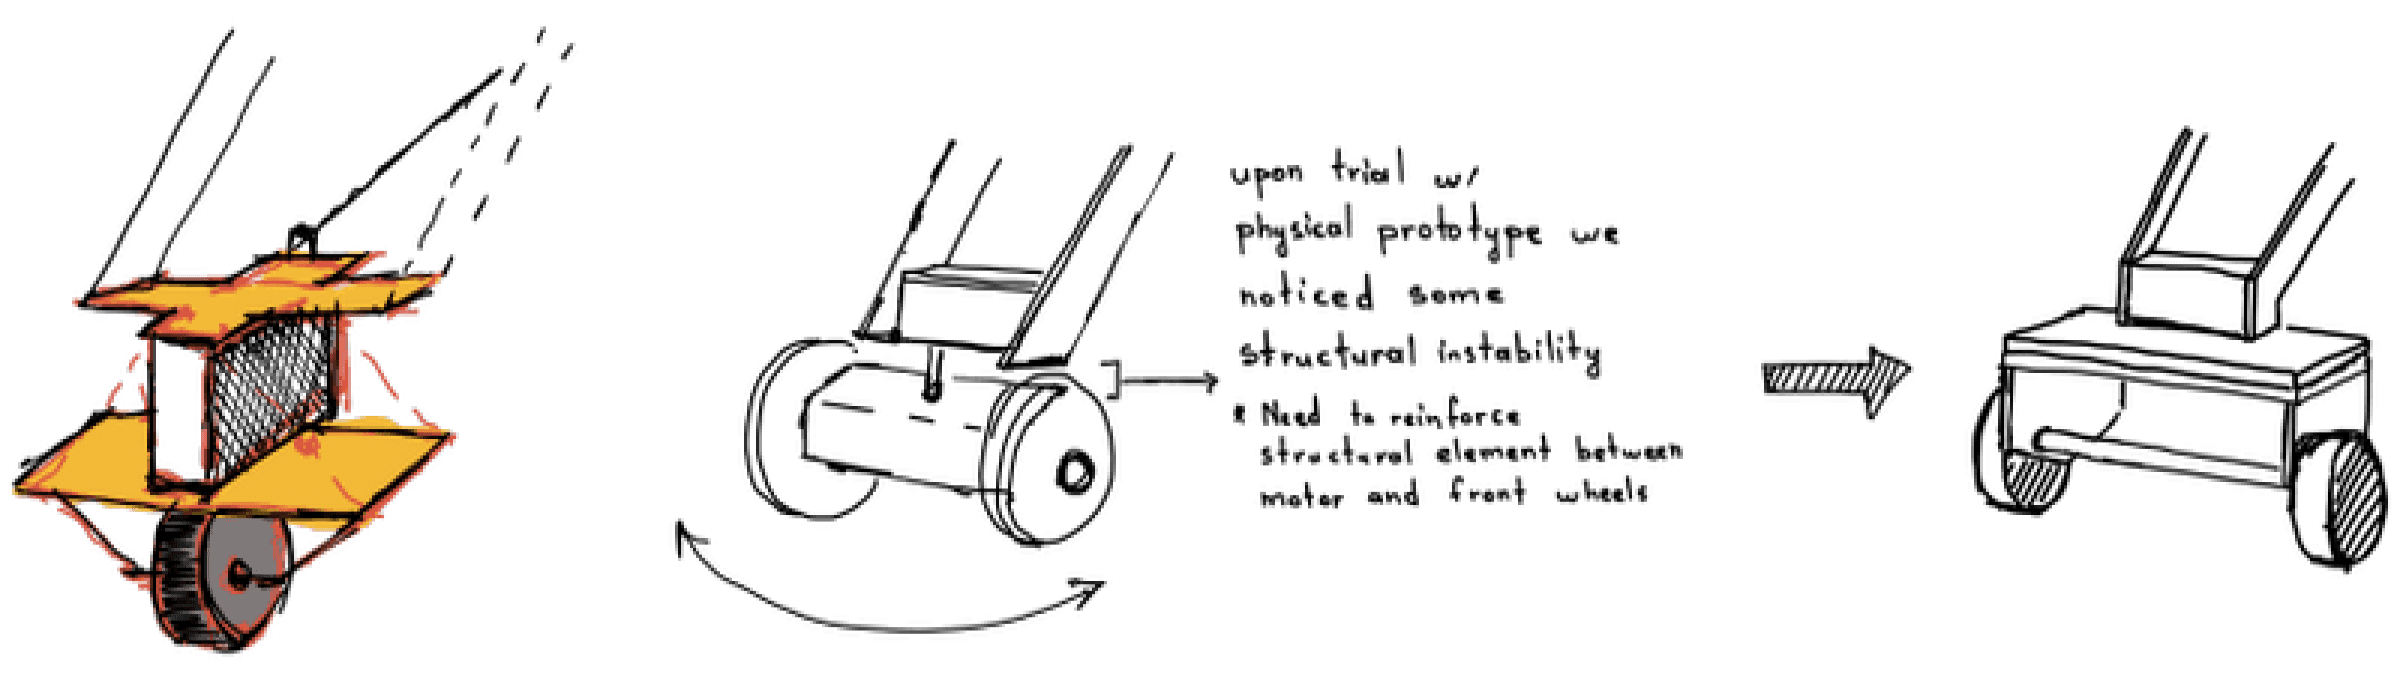
During our vehicle testing, we encountered a persistent issue: the rear wheel consistently rotated backward whenever we attempted forward movement. After researching freewheel mechanisms, we developed a solution using a gear and pawl system that leverages gravity to prevent reverse wheel rotation.
We designed four successive pawl iterations, each improving upon its predecessor. Through this iterative process, we discovered the critical importance of precisely calculating the pawl's center of gravity. When improperly positioned, this center significantly impaired the mechanism's performance.
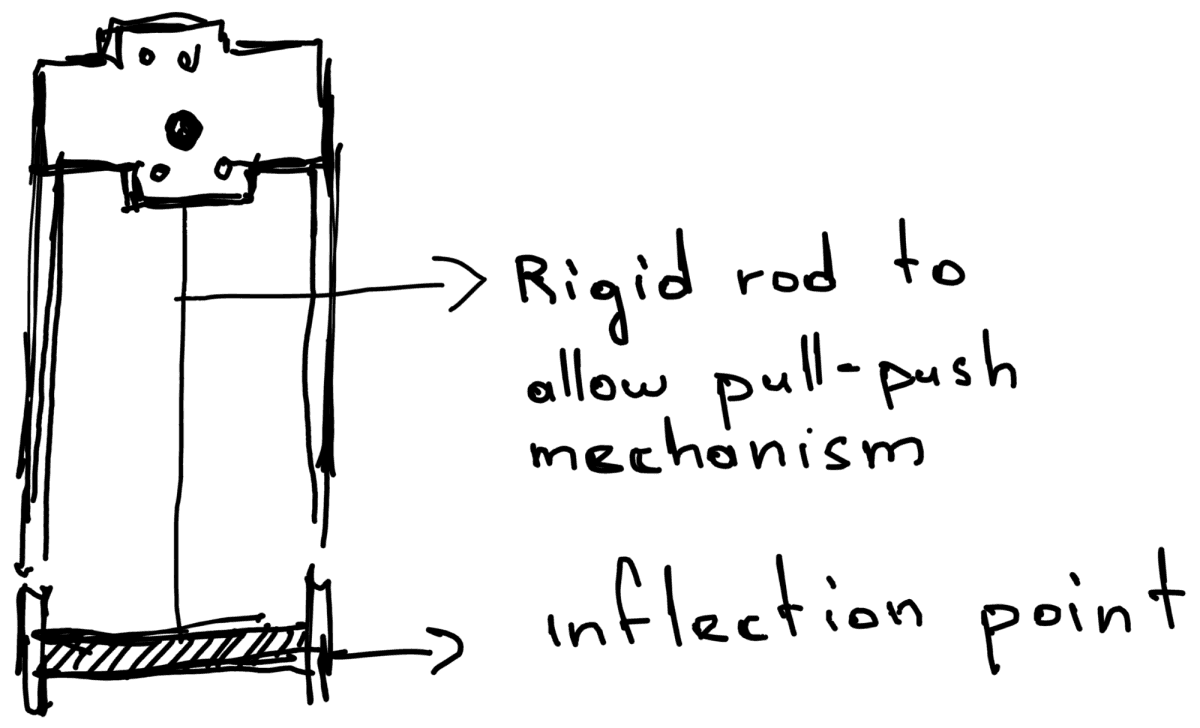
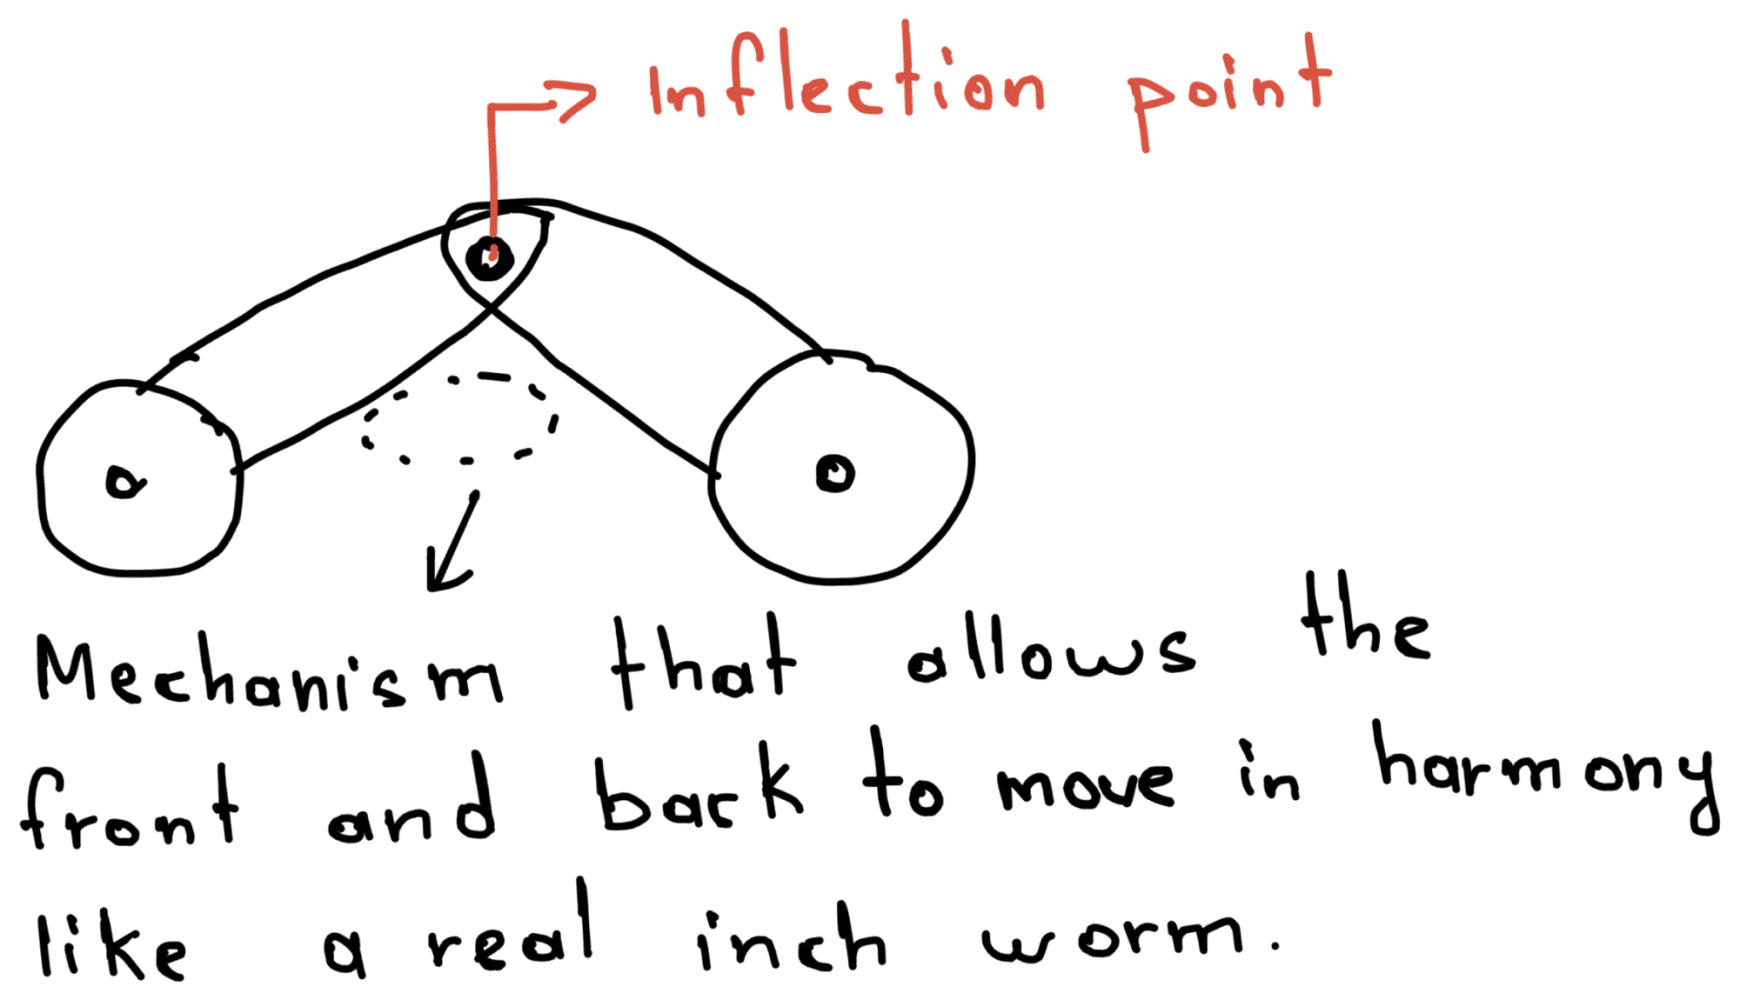
D. Inflection point
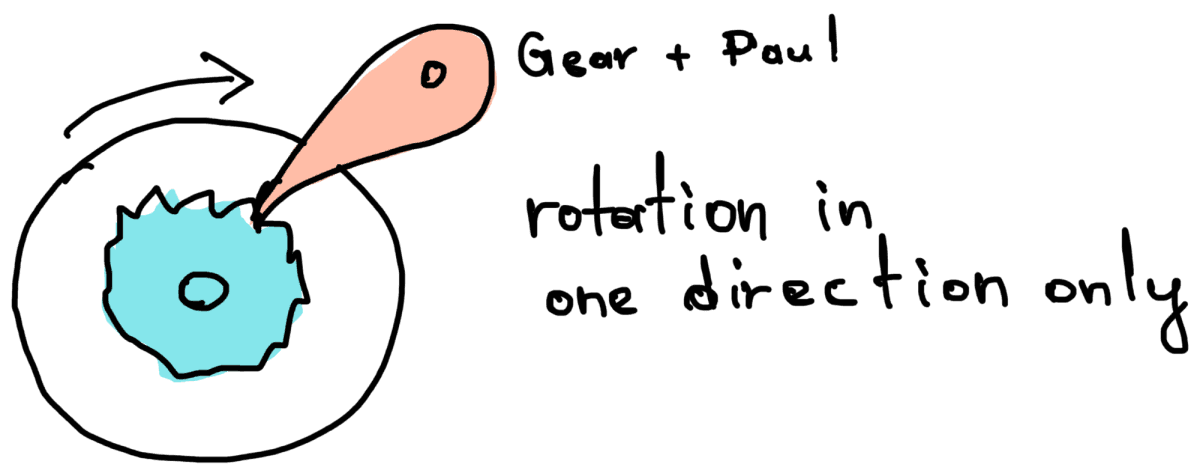
E. Gear + pawls system
Step Two: Turning Left and Right

J. Exploring turning mechanism
K. Servo steering concept
After solving linear direction motion, we shifted our focus to making the vehicle multi-directional. This step was very challenging because of the lack of documentation and research on the subject.
When we put together our first motorized prototype, we tried to use a servo, but had trouble connecting it to the feather and couldn’t get the power we were after. As a result we decided to use a stepper motor instead.
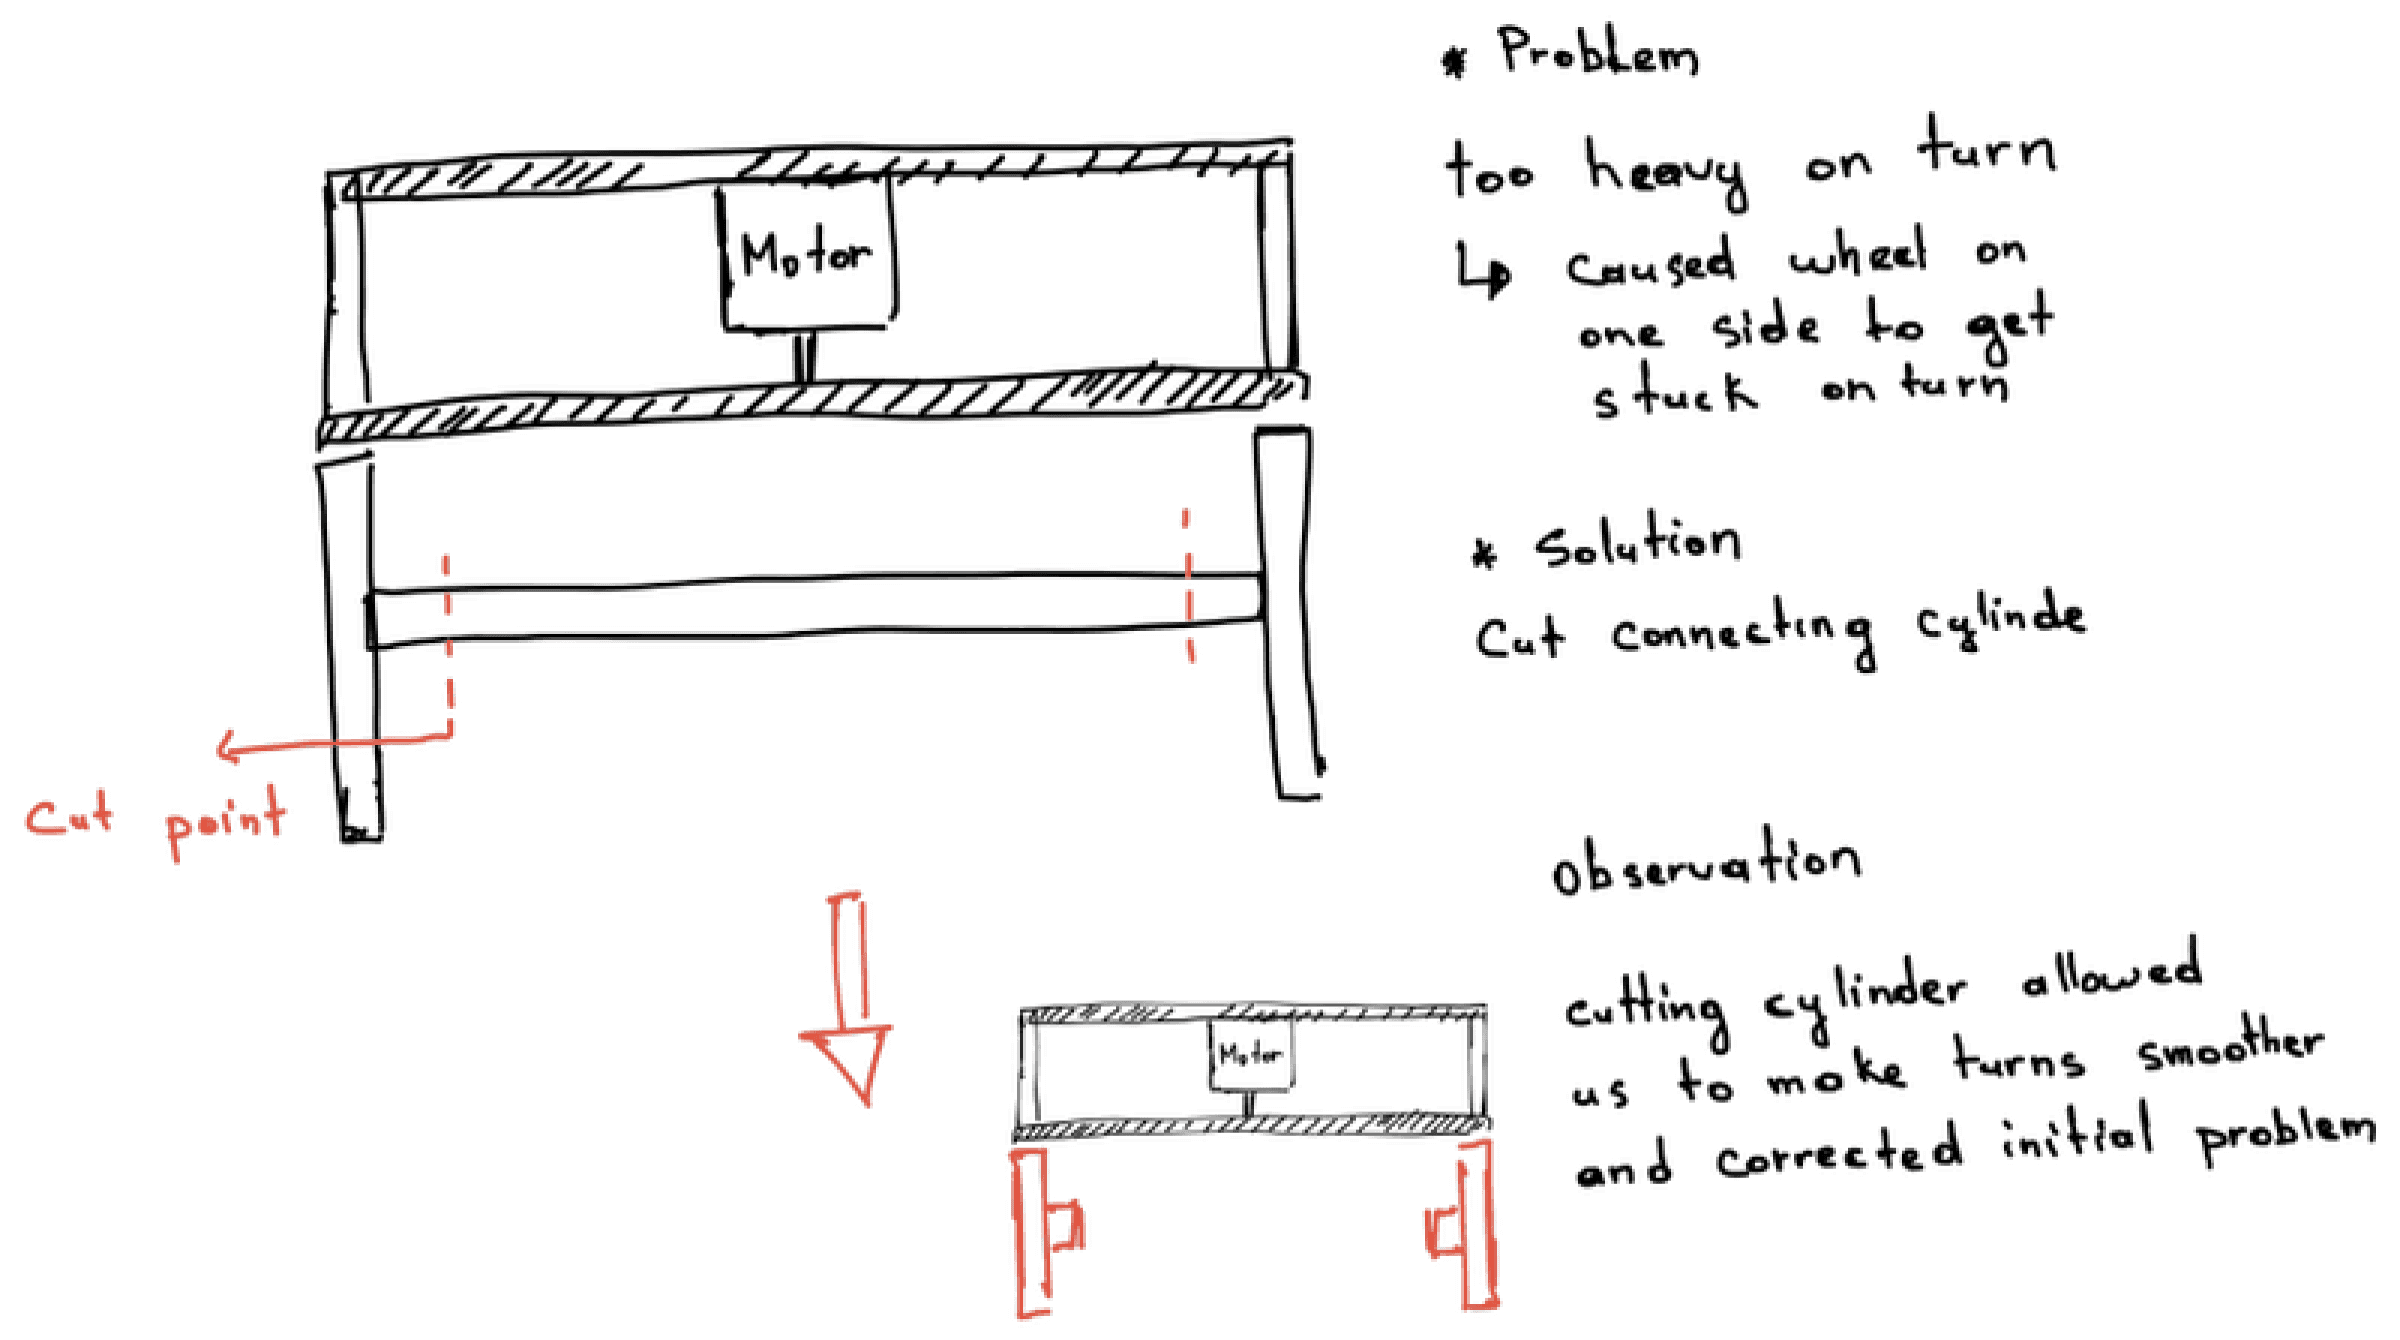
Though the stepper motor provided us with the power we needed, it weight made turning challenging.
L. Non-continuous wheels
We garnered that the two front wheels need to rotate freely from one another to avoid interference which translates in one wheel that keeps the other from rotating when we attemp to turn left or right. This causes more strain on the motor and increases our energy consumption.
We also found that inching vehicle too much while turning would cause imbalances that will sometimes cause the car to tilt over on its size.
To address this problem we came up with two creative solutions that required us to reimagine our wheel system.
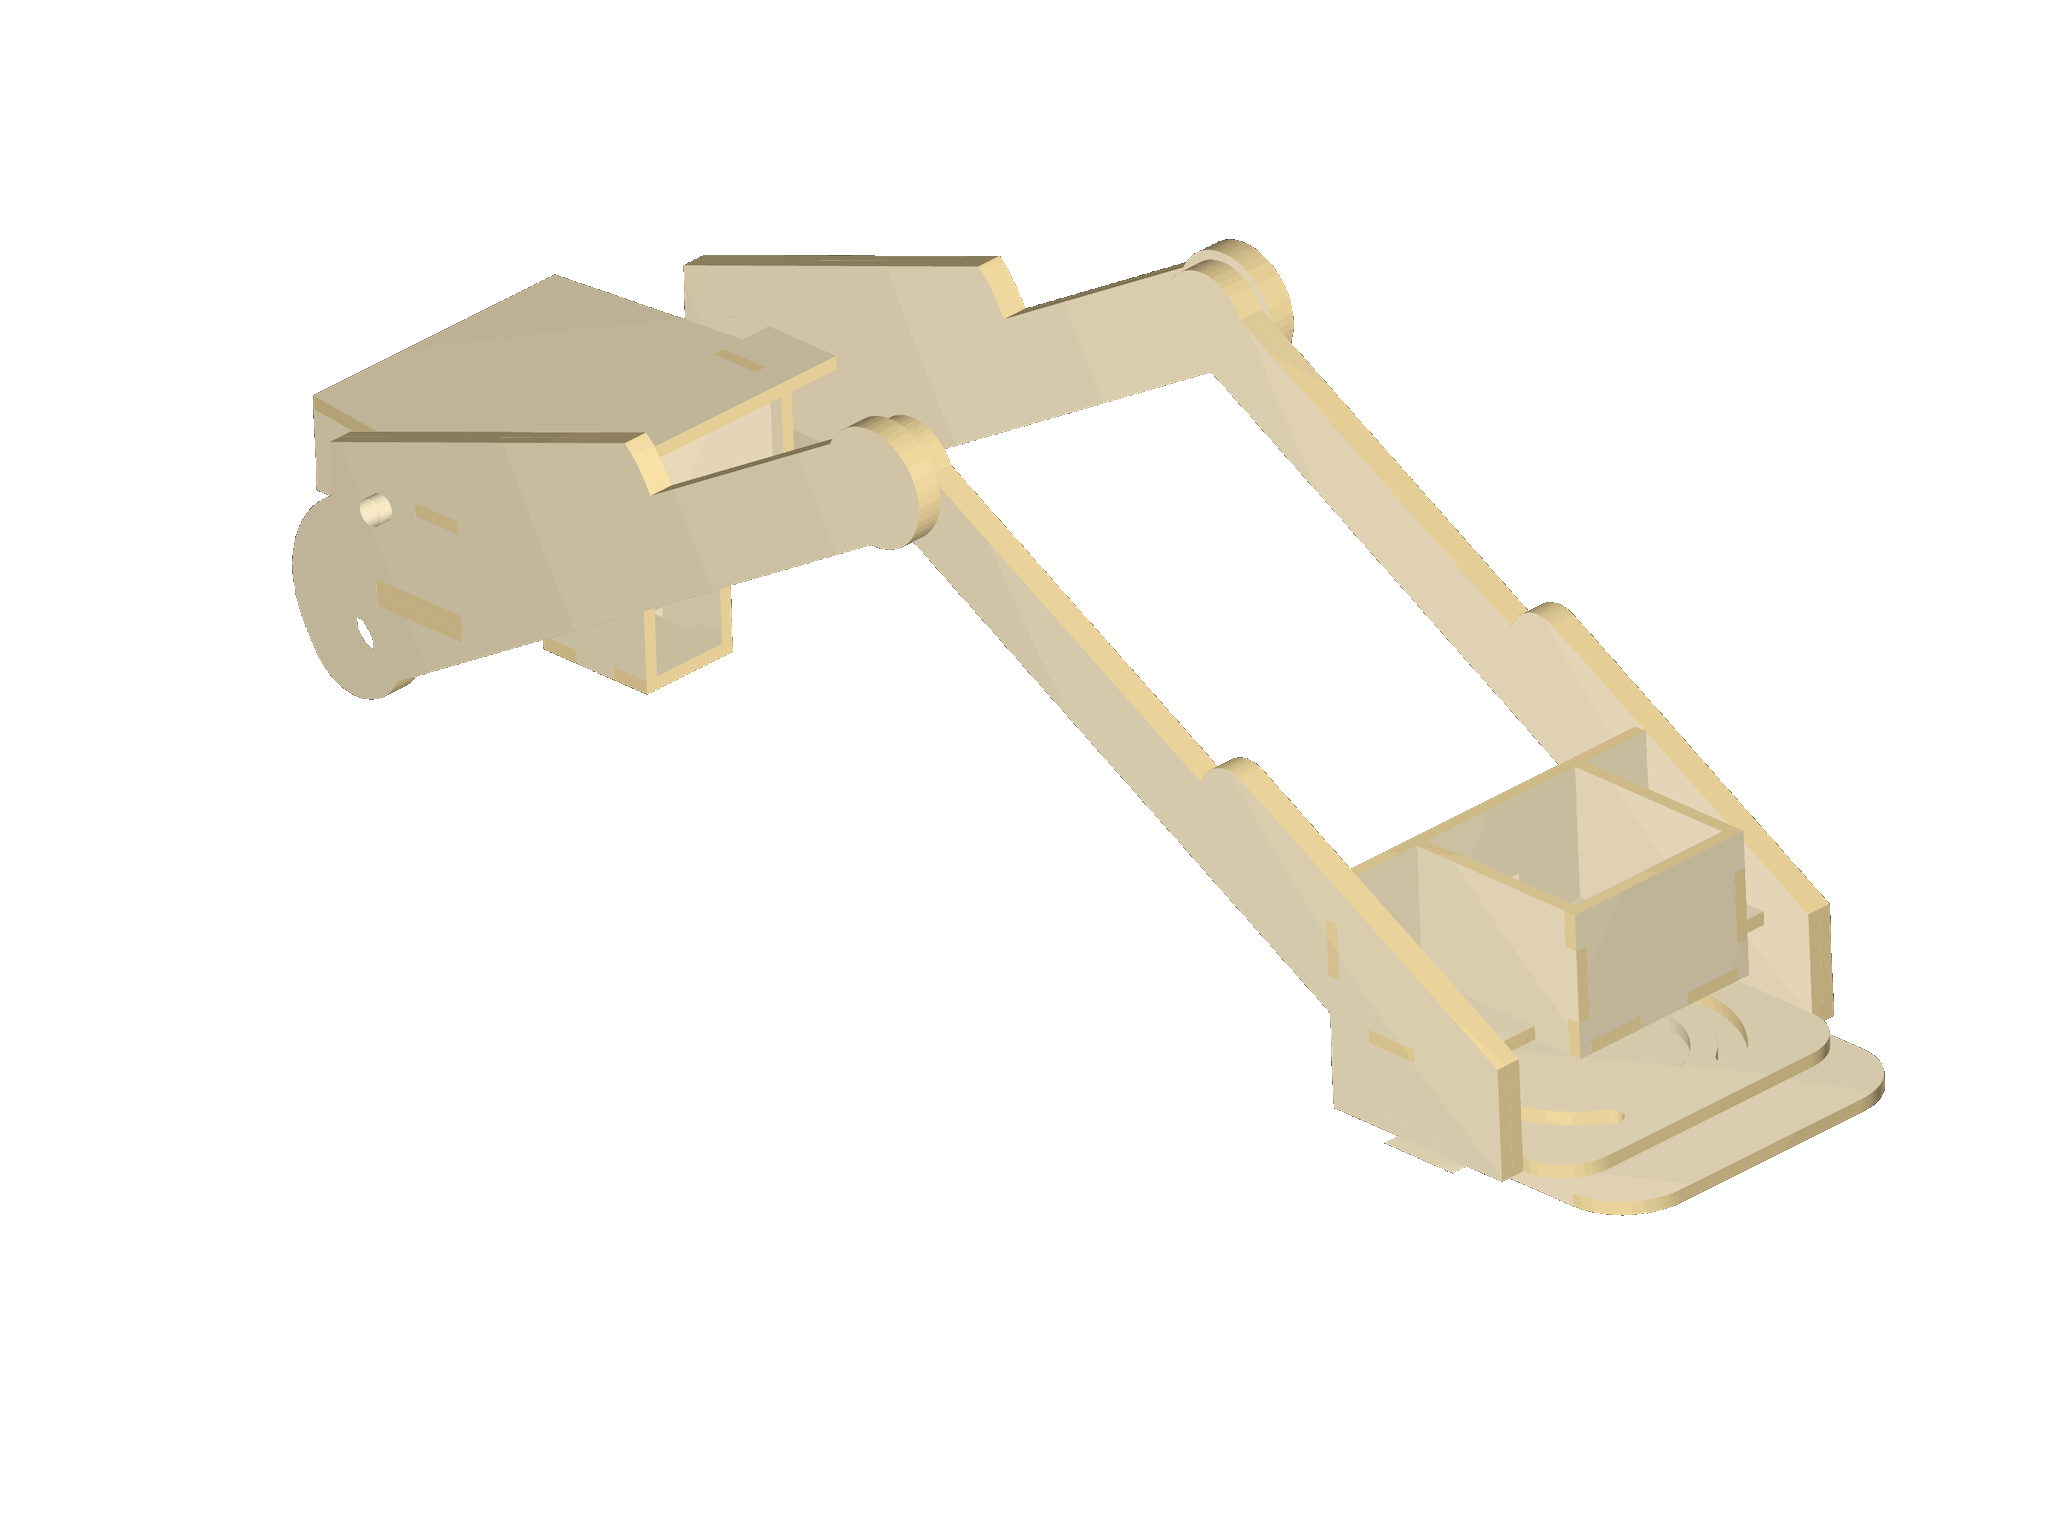
Tri-Wheel system
For our first solution, we created a 3 wheel system that ensured that we had wheels on ground at all times. This solution performed really well and resolved most of the imbalances issues our vehicle was facing when turning.
Having said that we knew that we needed higher wheels for our final exam parcour challenge which required us to go through a field of popcorn which we suspected might cause some trouble given how our wheels were to the ground.

M. Tri-wheel system
Rotation control system

N. Rotation system
By limiting left and right turn within a certain range, we found out that a three-wheeled system was not necessary and that all wheels can share the same height without us having to worry that the car will tilt over on its side while turning.
Finding the sweet spot to keep the car leveled took a lot of trial and error as well as math but in the end we prevailed. After completing the design of the system, we 3D printed it and laser cut the base it was going to sit on. And just like that we had completed the last piece of our puzzle.
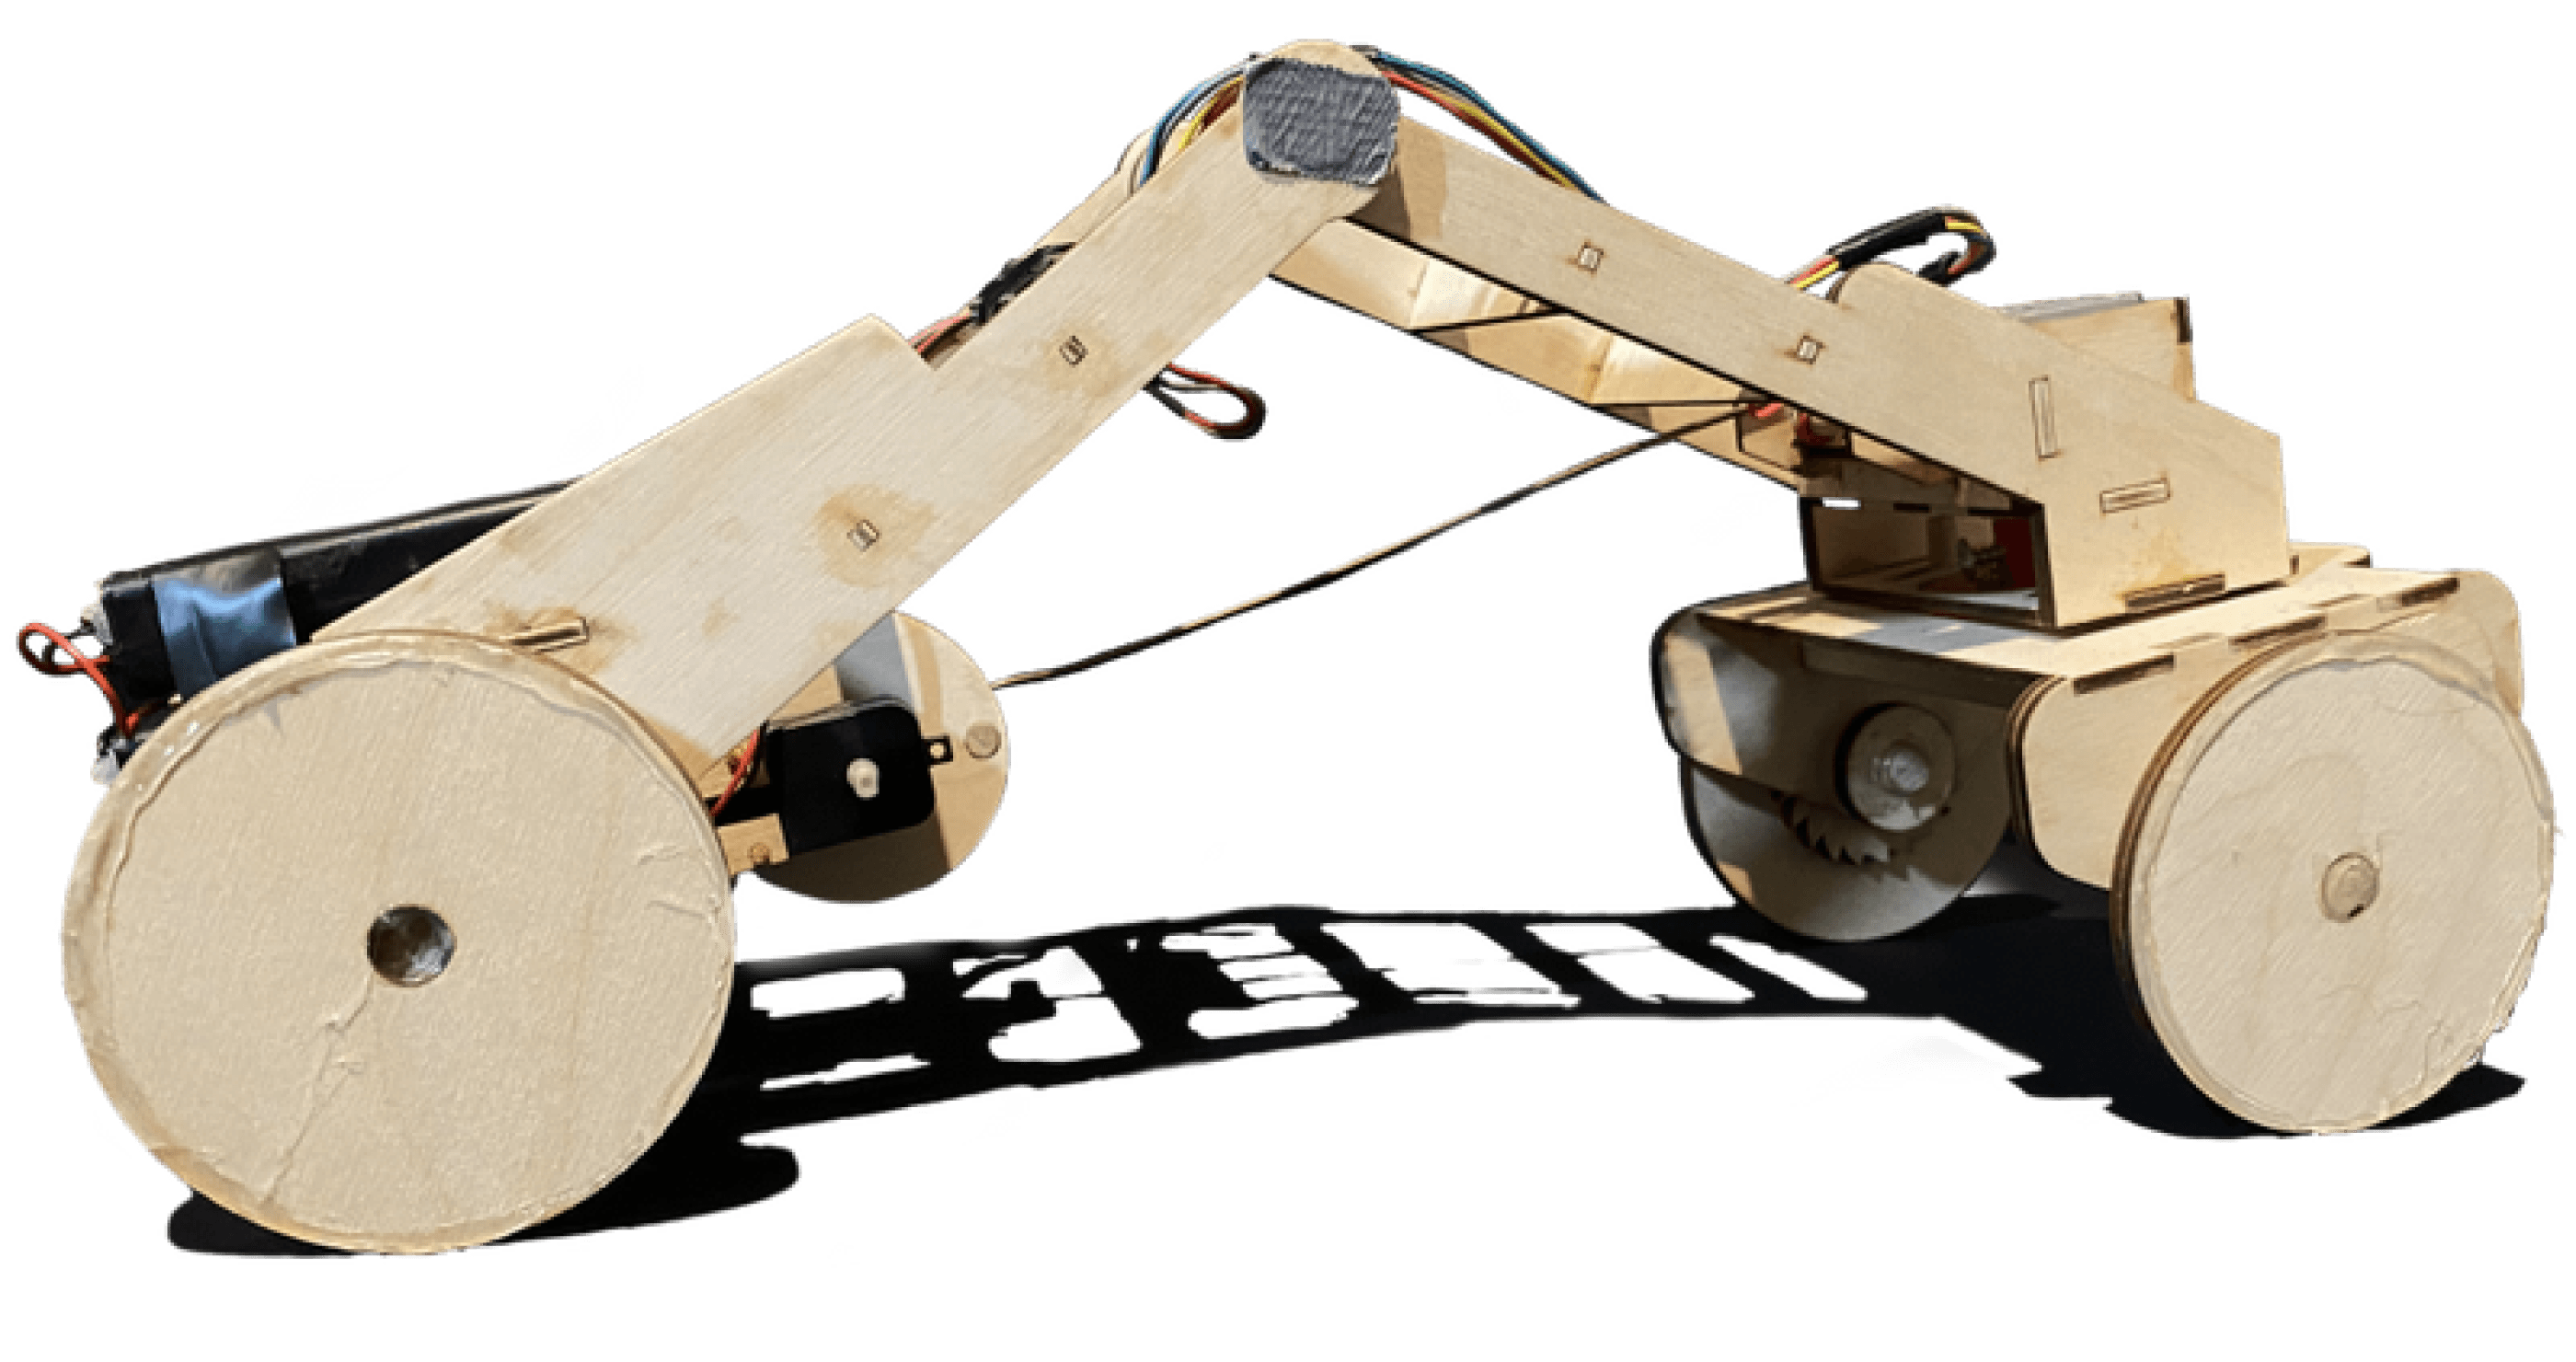
Final iteration
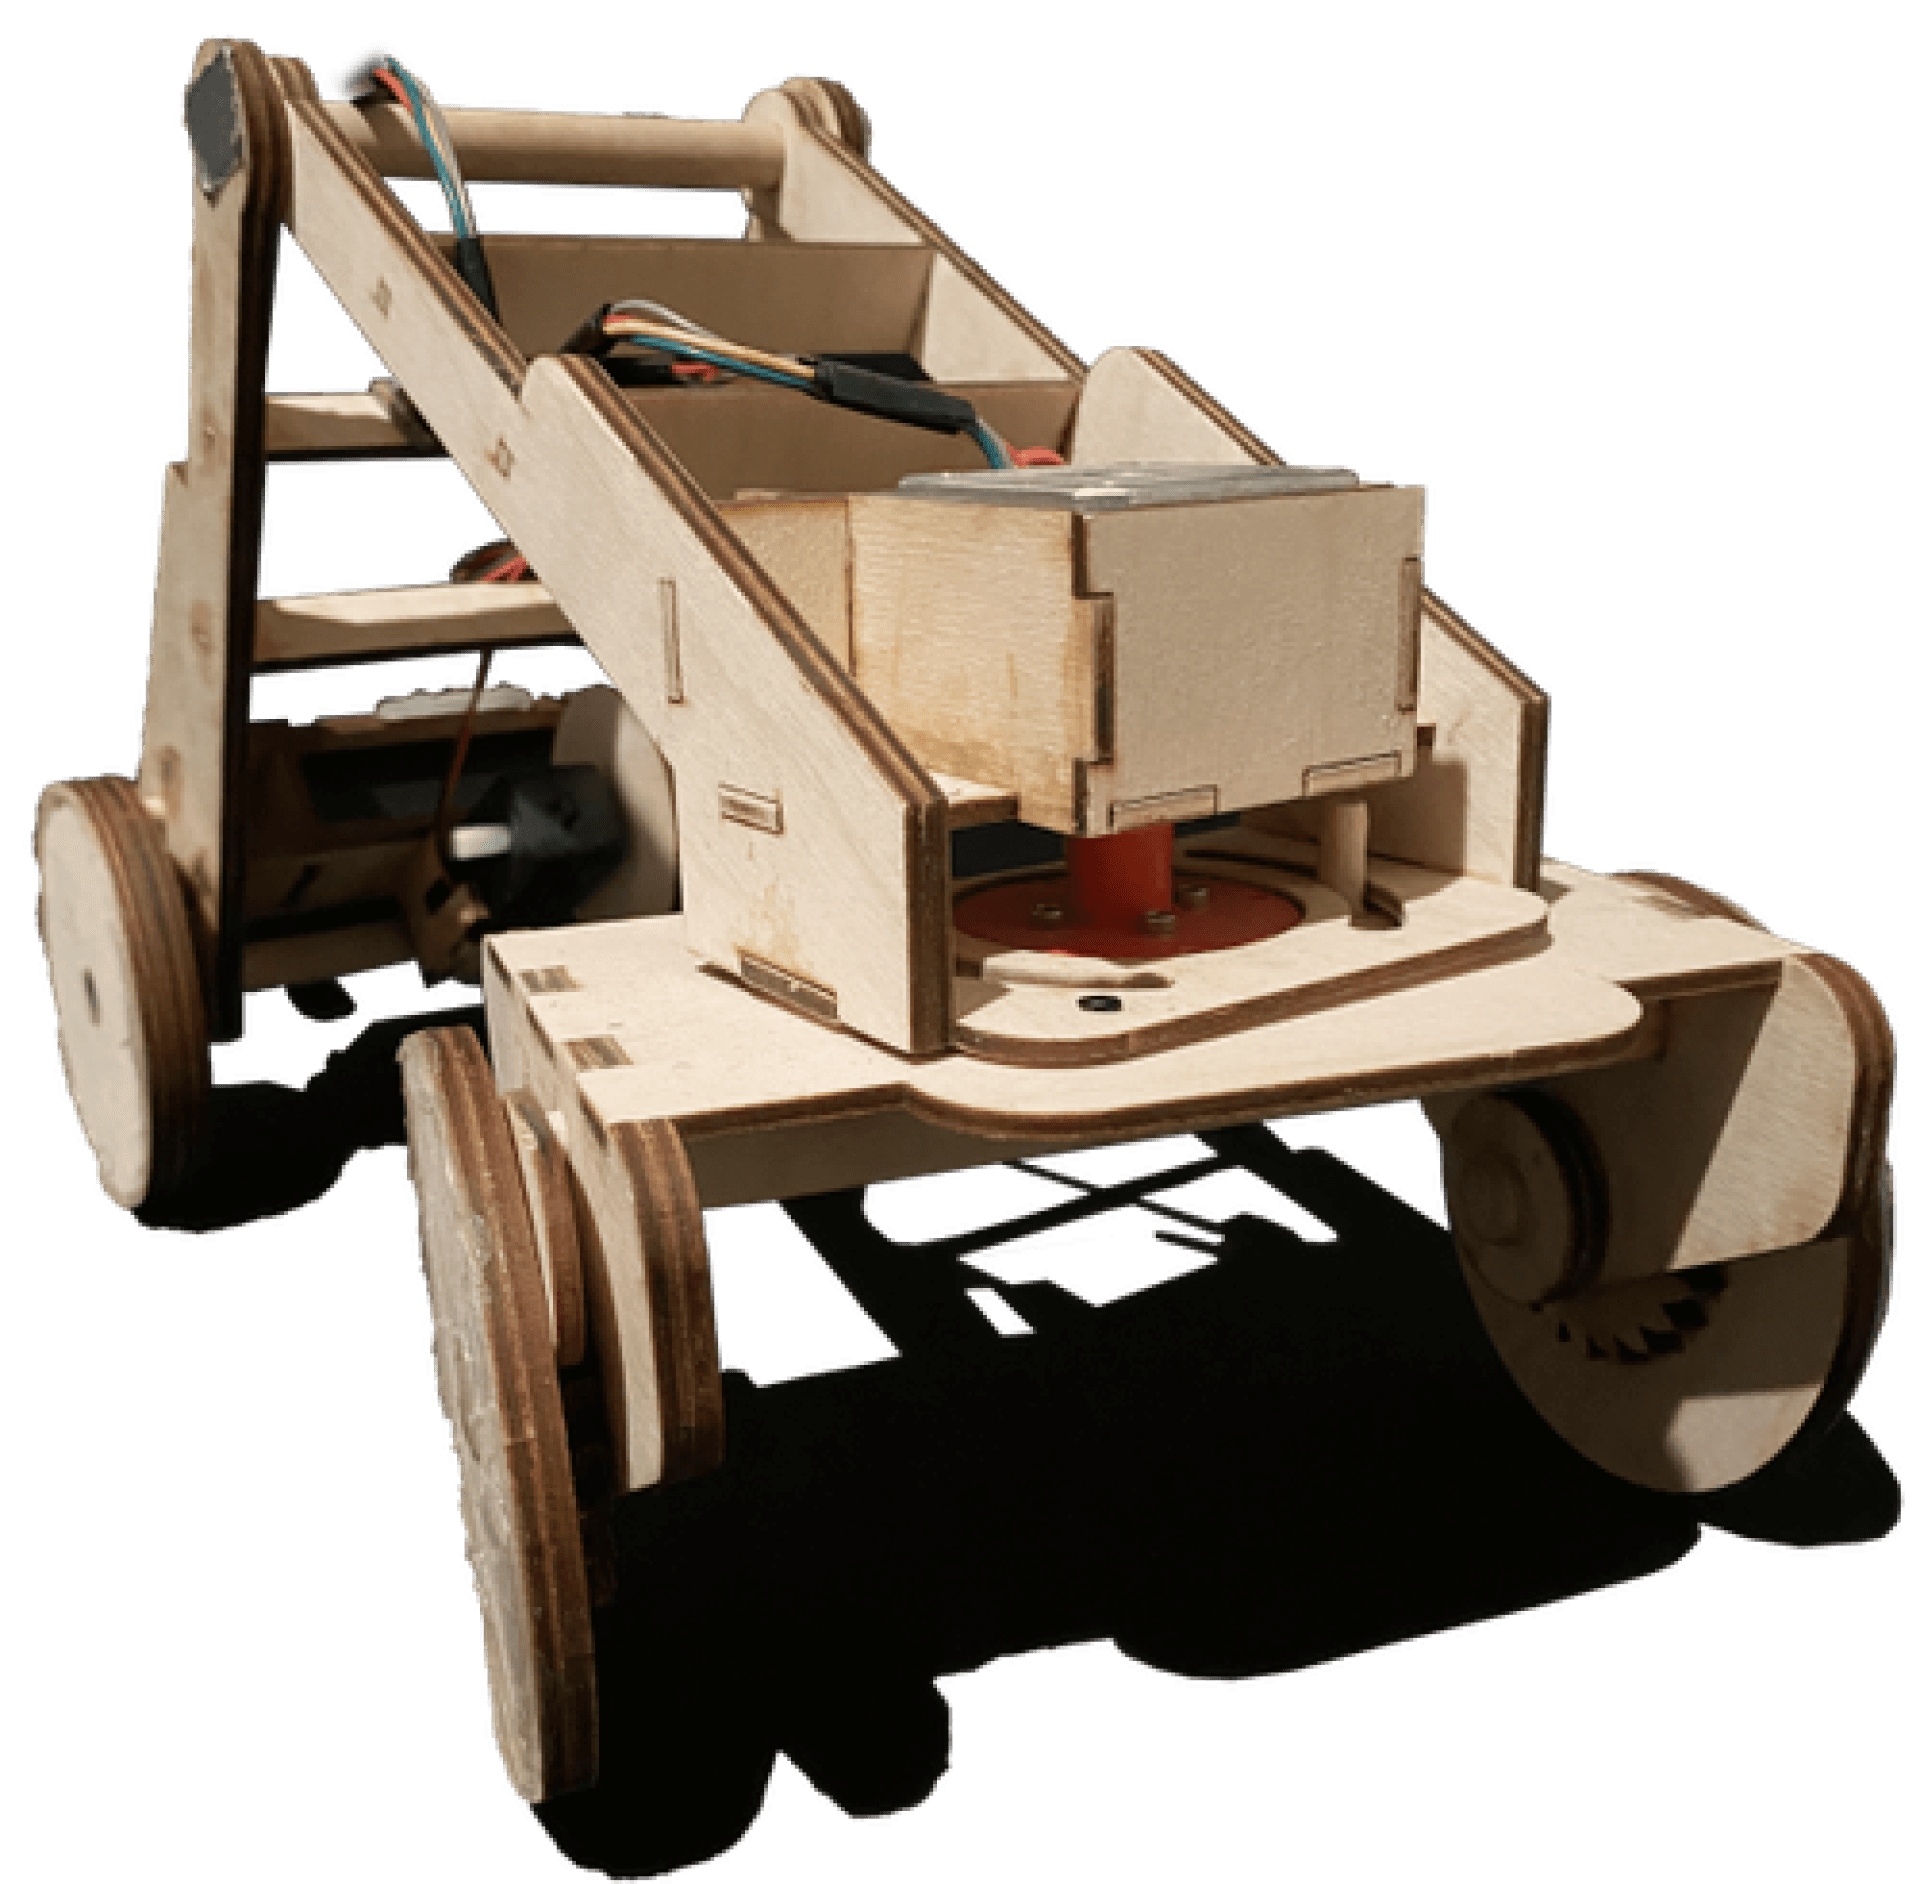
Inspired from Tsugite, a traditional japanese joinery, our final prototype is a beautiful and seemless vehicle that sports an industrial look.
It is very easy to assemble and requires no tools. Even more, it was one of the cheapest vehicle to manufacture costing us only $17 (not including the motors and feather which were provided by the class.)

Physical prototype
Reflection
Material costs can make or break your project. Our designs balance beauty, durability, and budget-conscious choices.
Cost of materials
8 AA batteries $12
3 12x30 plywood $5
All motors and electrical components were provided by Chris Myers, professor of DES INV 22
Hector and I are thrilled with our results. We took a simple, single-direction design and transformed it into a fully functional vehicle through creative problem-solving.
Personally, this project deepened my appreciation for rapid prototyping—not just as a way to test ideas but as a crucial step in identifying and resolving issues early. This process gave us the confidence to refine our final prototype effectively.
Beyond the technical aspects, this experience also strengthened my teamwork and collaboration skills. It pushed me to become a more effective communicator, both in conveying ideas and in working closely with others to bring our vision to life.
Key takeaways
More Projects

